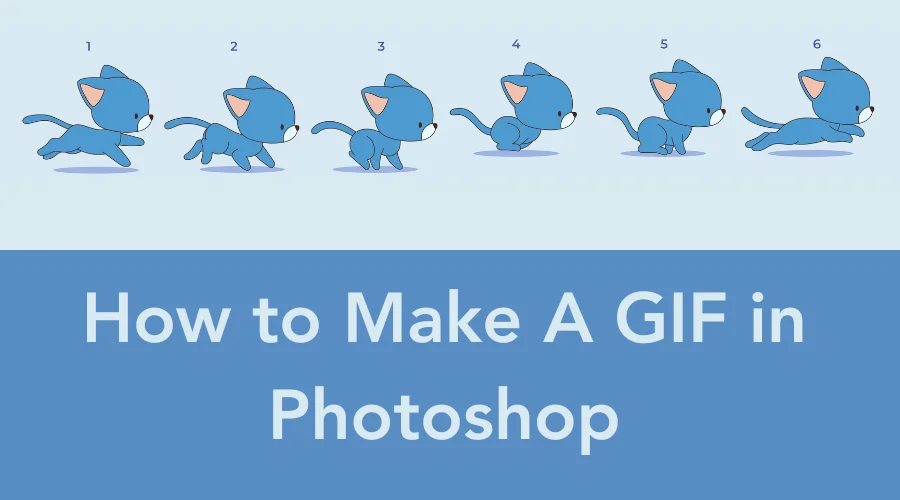
5 Easy Steps How to Make a GIF in Photoshop [Animated] 2024
GIF is a type of image. If you like to make funny memes, GIFs will be very useful. If you like to update funny memes on your social website accounts, GIF images will be your thing. If you like to upload memes then you might sometimes wonder how these funny and nice GIF images are created. Or when you see these GIF images, you might wish to create your own GIF images to upload to your social media account.
Today we will learn how to make a GIF in Photoshop. If you are interested to learn how to make a GIF in Photoshop2024. Or want to learn how to make a GIF in Photoshop for video this tutorial is for you. In this tutorial, we will also learn how to make a GIF for a series of images. So let's start learning about GIF and make a GIF in Photoshop.
What is a GIF Image?

The full form of the GIF is 'Graphics Interchange Format' it is a format of image. This format was introduced by CompuServe in 1987 to post simple graphics like stock market quotations. The GIF image format was developed two years before the World Wide Web. Besides funny animation you can use this format for different purposes. Such as advertisement campaigns, displaying information, displaying cushions, or different instructions.
Although this is an image format it is not a visible still image. This format can contain and display more than one image. This image format also can create an animation but with no audio. GIF format images are 8 bits means in a GIF image you can show only 256 colors. Because of its ability to create a series of images or animation. So we can call a GIF formatted image 'animated GIF' but it is not a GIF animation.
Different Image Files and GIF format
Let's learn about different types of image formats and their characteristics. We will discuss the most used image formats in short.
GIF ( Graphics Interchange Format)
GIf is the only image format that can contain animation or a series of images. GIFs are ideal for small graphics on websites and in emails. GIF files have a color limit of 8 bits. You can show 256 simultaneous colors. So these files can't achieve photographic quality. GIF files are not compressed but they are typically small and highly portable. which makes them suitable for web images.
JPG or JPEG ( Joint Photographic Experts Group )
JPG is the most used image format on the internet. It is the best image format for online images and some printed photographs and artworks. These files are compressed and they will lose only a slight of quality. The JPG format supports millions of colors. This image format is popular for storing digital photos. JPG format is also used for non-professional printing and for inserting images into various documents.
PNG ( Portable Network Graphics )
The PNG format is a lossless format of images. Which is developed as the next-generation image format and replacement for GIFs. The PNG format supports a transparent background and up to 16 million colors. Although GIFs are suitable for buttons and banners on websites. Most web developers prefer the PNG format instead of the GIF because of its huge range of color-accepting features.
TIFF ( Tagged Image File Format )
TIFF format is used for high-quality photos or photographic artwork. TIFF is the lossless image format used for string high-quality images for printing works or publications. The TIFF formatted images are very large files and are popular for storing fine artworks of higher resolution. This format is best reserved for high-quality prints, professional publications, and archival purposes.
How to Make A GIF in Photoshop
There are two ways to Make a GIF in Photoshop. you can make a GIF in Photoshop with photos or you can make a GIF in Photoshop from video. As we use photoshop cc os we will learn how to make a GIF in Photoshop cc.
- How to Make a GIF in Photoshop From Photos: To make a GIF with images. You need a series of images. Your images should be in series so you can explain or expose your feelings or thoughts through your GIF images.
- How to Make a GIF in Photoshop from Videos: Another process is “GIF image from the video”. GIF image from the video is simpler than creating GIF images from images.
How to Make a GIF in Photoshop From Photos
If you decide on the subject and collect all the photos you are very close to you upload your own GIF images on your website or social media accounts. Just follow the steps we used to make a GIF in Photoshop as follows.
Step 1: Create an Image Folder & Open Photoshop
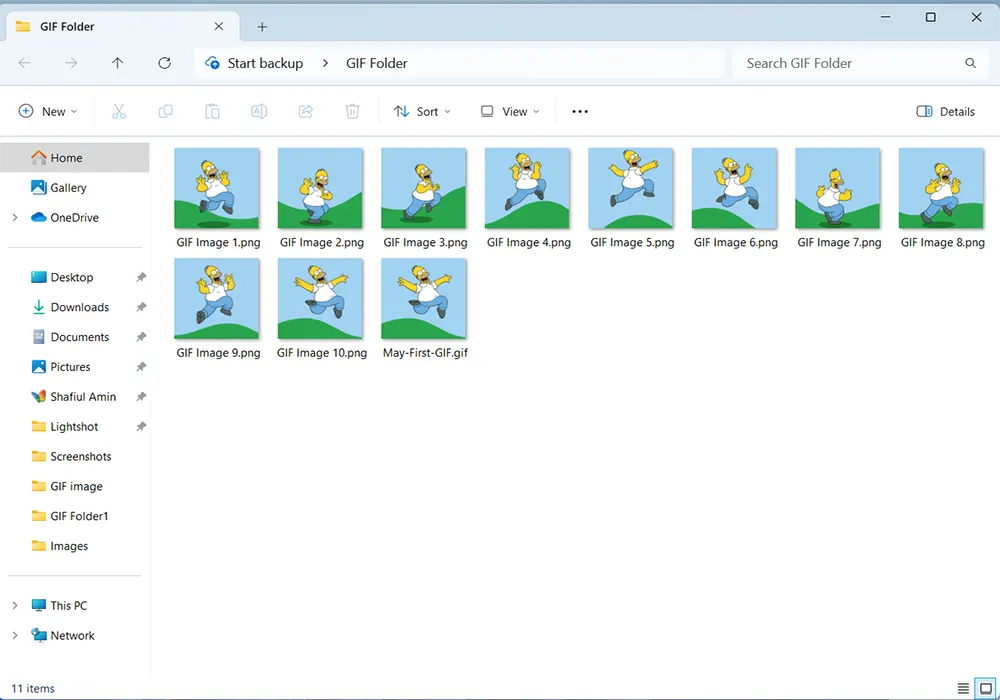
Right on your screen and a menu will appear on your screen click on new and then from the second submenu select folder. Give your image folder a name for this example we name our image folder 'GIF Image'.
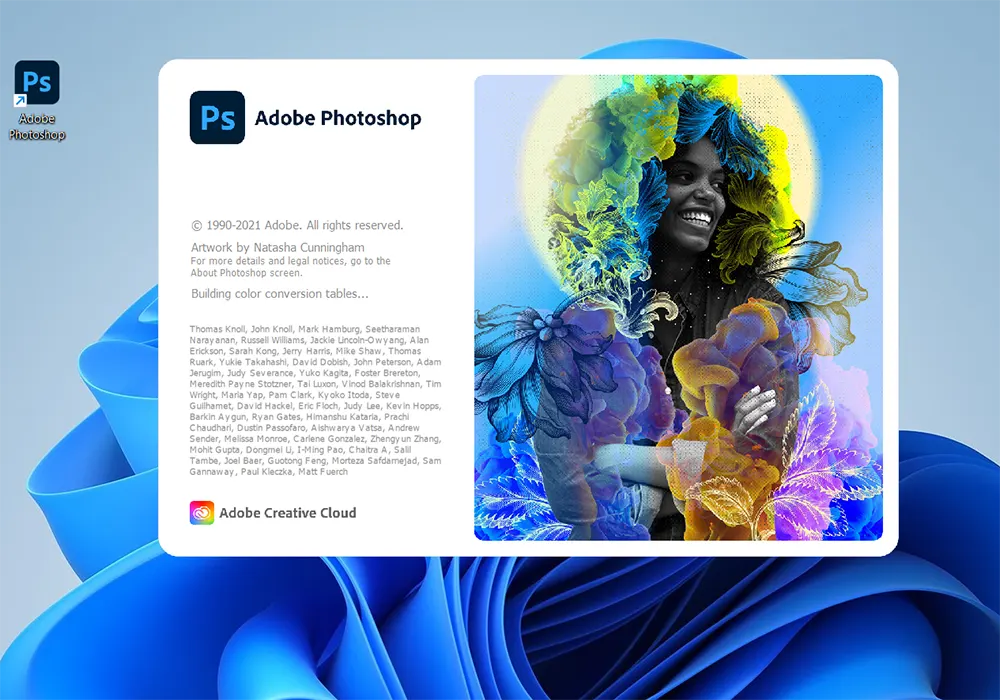
Now open your Photoshop software. If you don't have a Photoshop shortcut on your screen, go to the start menu and double-click the Photoshop software icon. Otherwise, double-click on your Photoshop icon and wait until your Photoshop Software opens and is ready to edit.
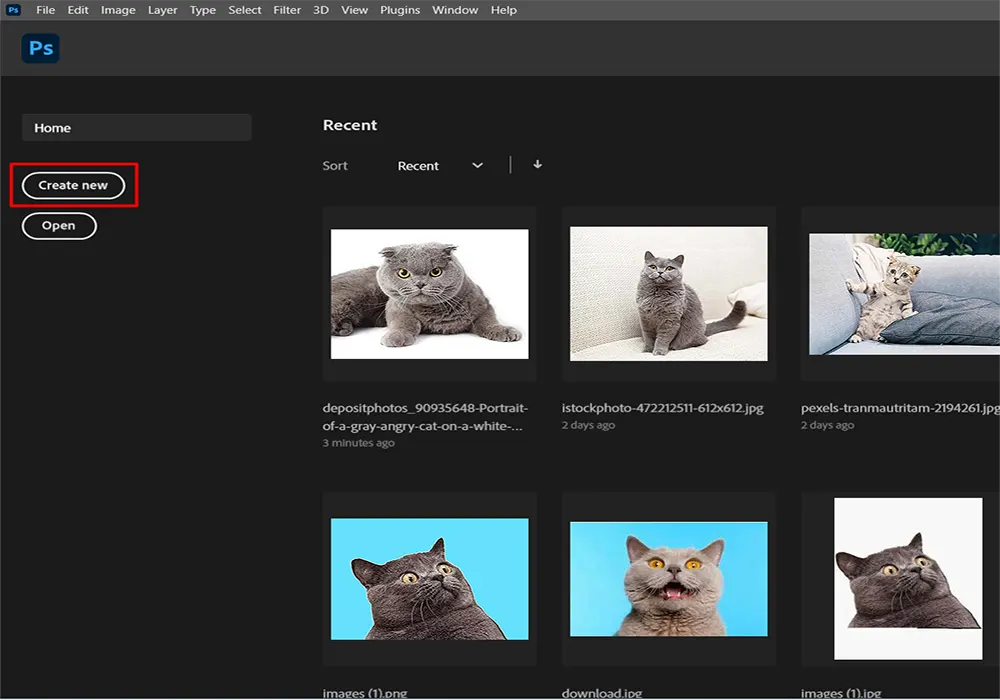
Step 2: Open a New Document file in Photoshop
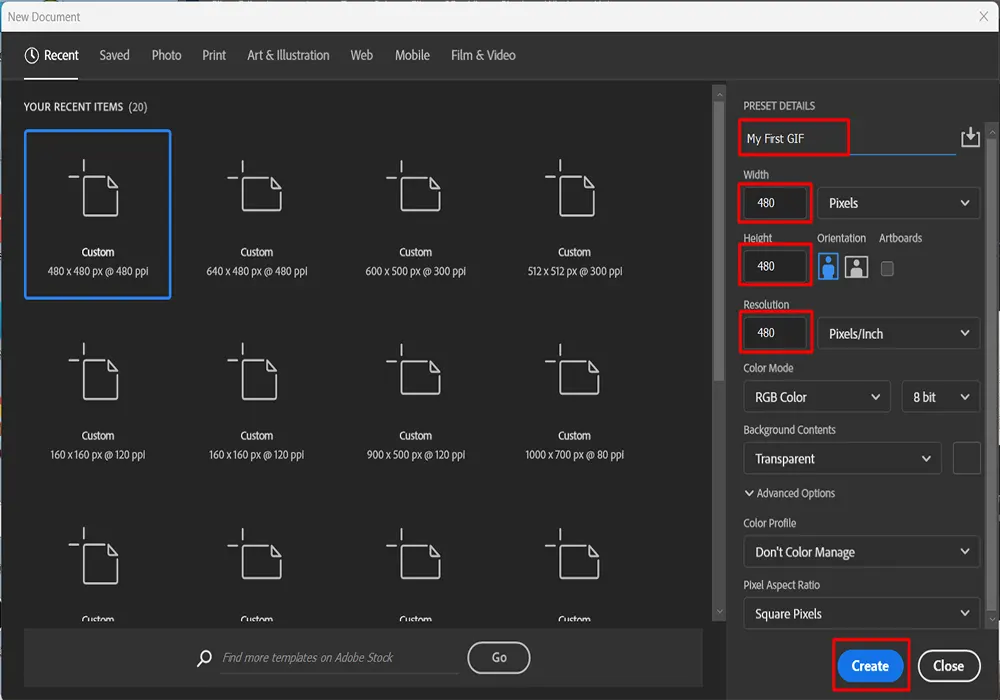
After opening Photoshop, you will see two buttons 'Create New' and 'Open'. Click on the "Create New' button. A new window will open. In this new window, you can name your GIF and set the side of the image. In this example, we name our GIF file “My First GIF”.
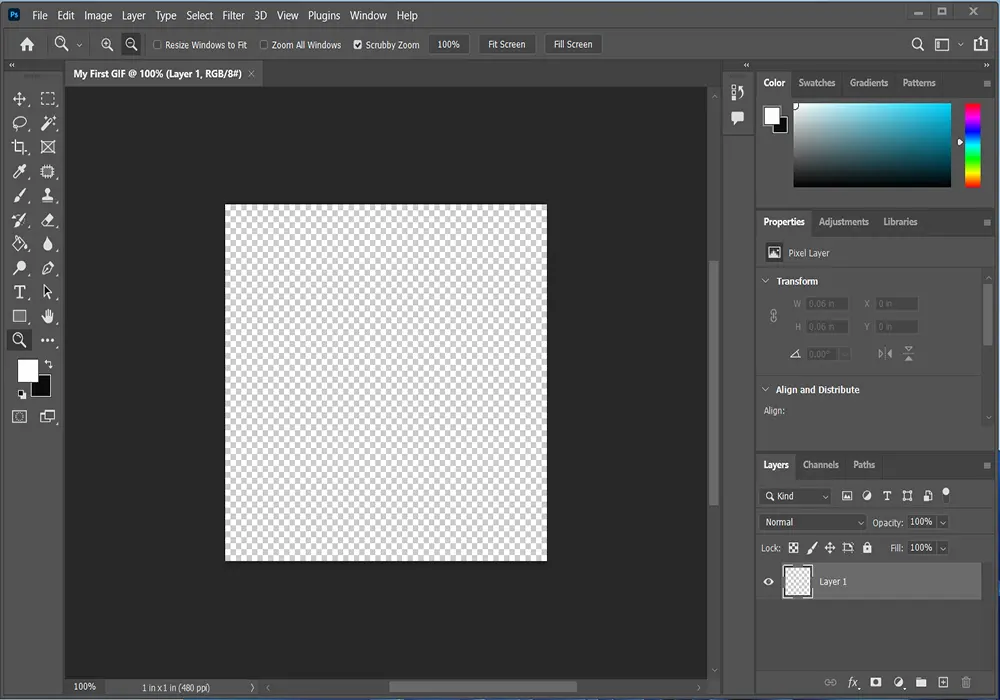
The average size of a GIF file is 480px by 480px and the resolution will be 480px/Inch. After setting the Width, Height, and resolution click on the ‘Create’ button. Your new document file will be created as “My First GIF”.
Step 3: Open All images in Photoshop
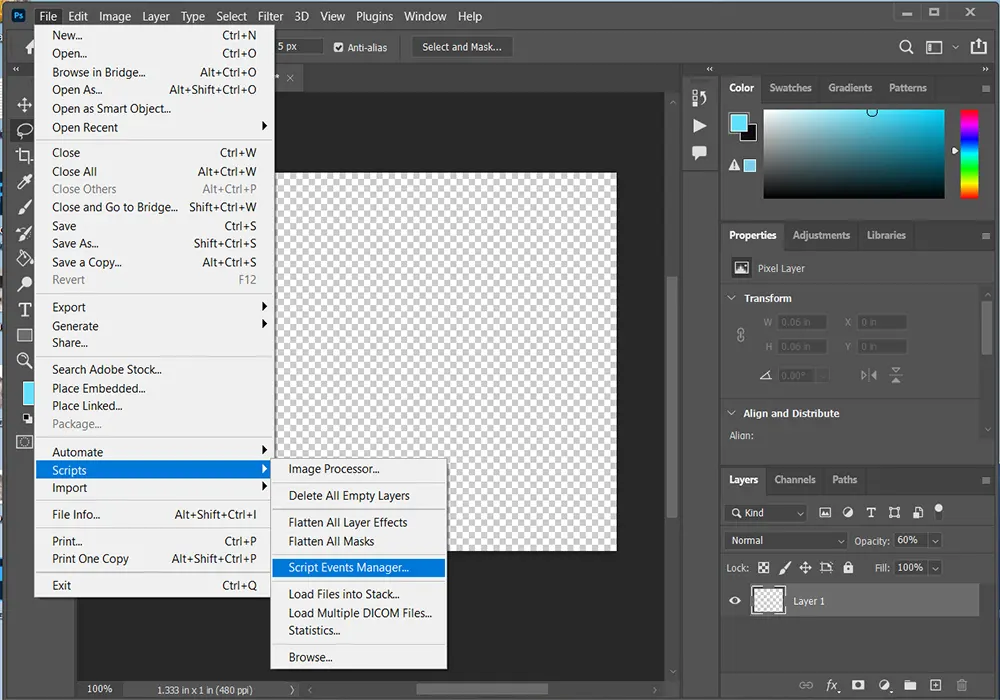
Select 'File' from the menu bar at the top of the screen. A dropdown menu will appear on your screen. Go to 'Scripts' on the dropdown menu and the second menu will appear. From the second menu click on the 'Load Files into Stack..' option. An empty load layer panel will appear on your screen.
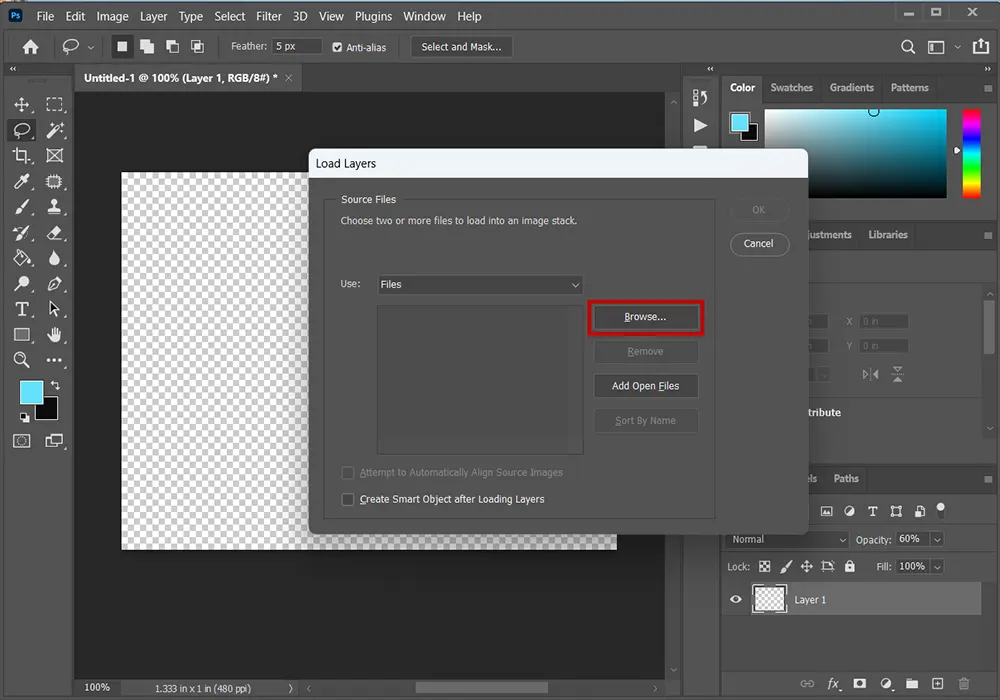
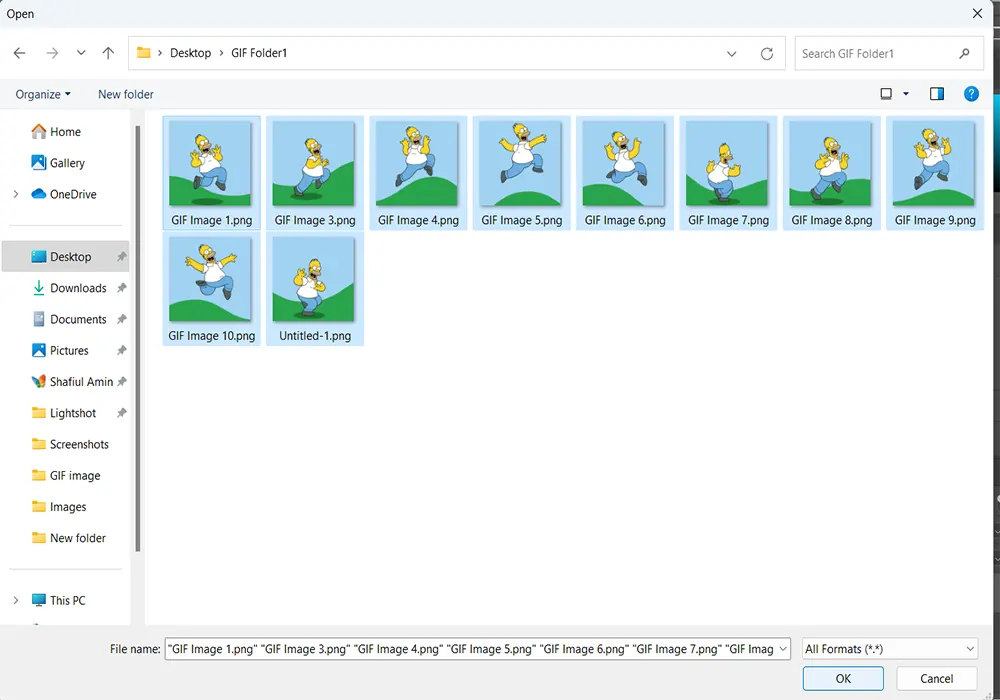
At the new ‘Load layer’ panel click on the ‘Browser’ Option it will redirect to your default image folder. From here go to the ‘GIF Folder’ and select your images. Select all images and click on the ‘OK’ button.
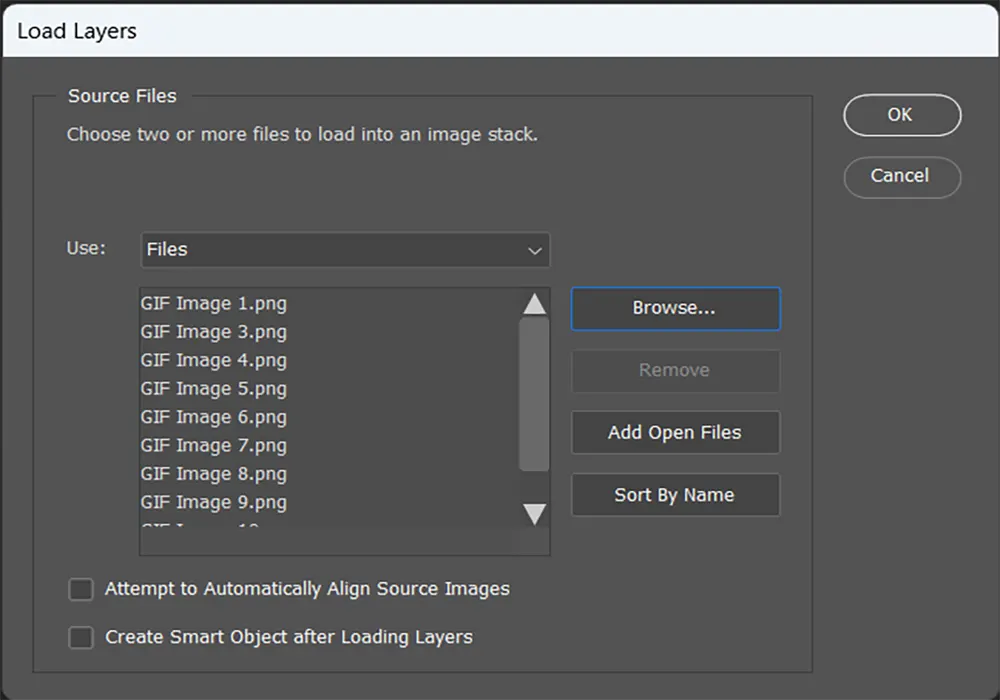
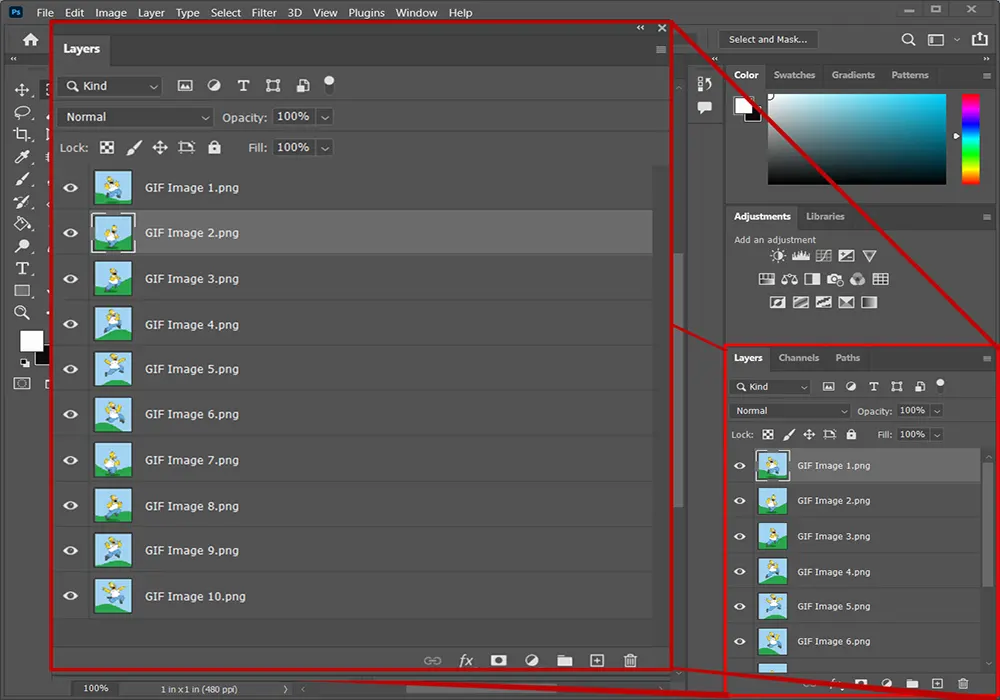
Your images will load on the ‘load Layer’ panel. Now click on the ‘OK’ button at the top right corner of the load layer panel. All images will open in Photoshop with different layers. Now you can create an animation for your GIF images.
Step 4: Create Animation
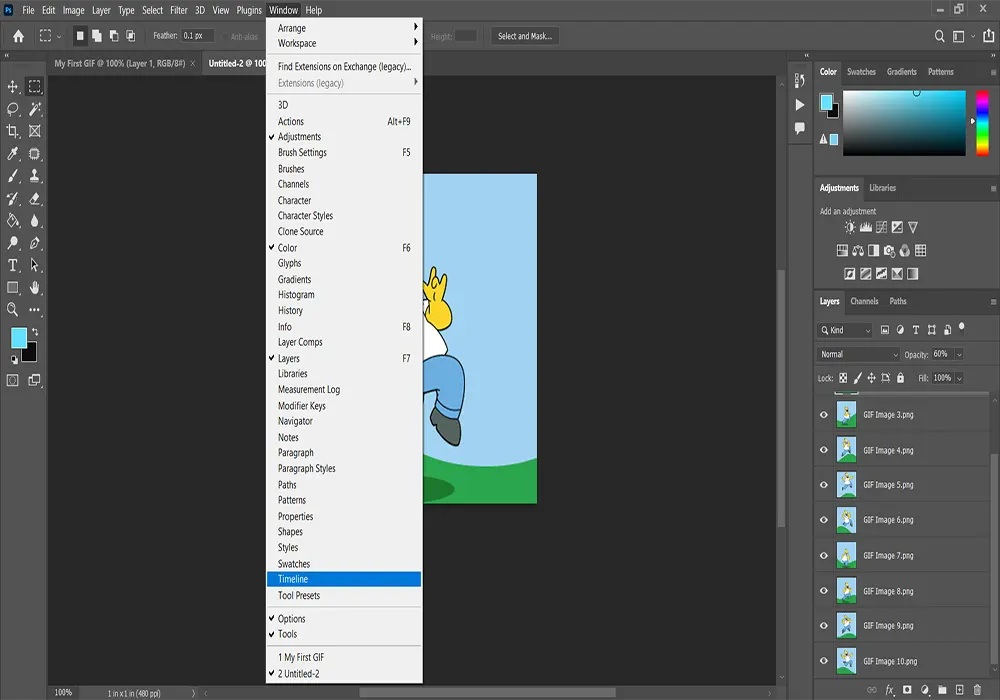
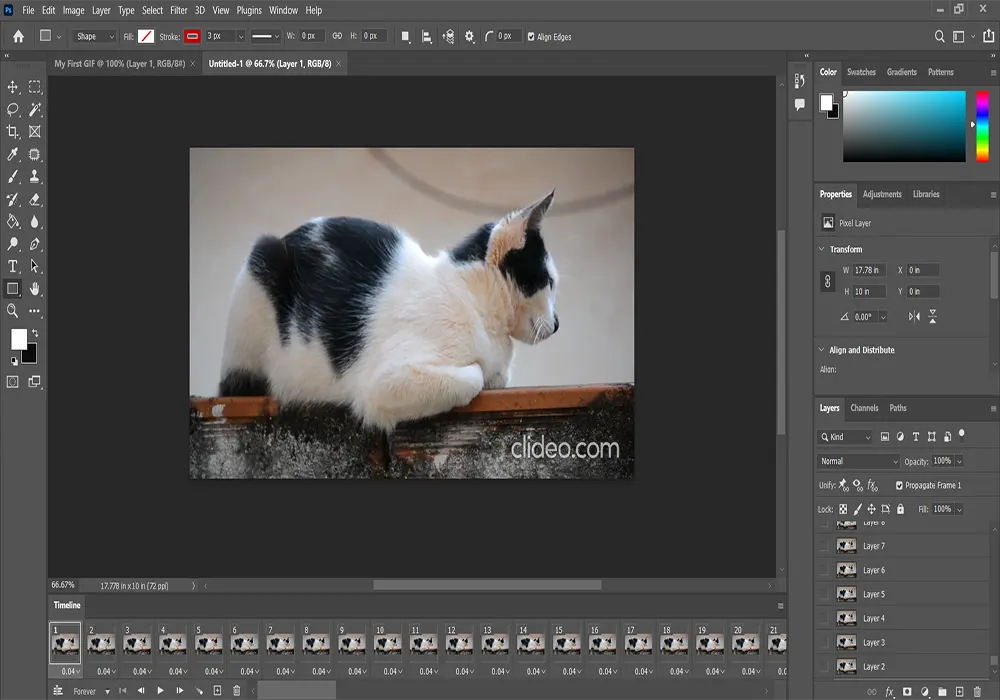
To create animation for your gif image click on the 'Window' option at the top of the screen at the menu bar. A dropdown menu will appear on your screen. From the dropdown menu select the 'Timeline' option. At the bottom of your screen, an empty timeline panel will appear.
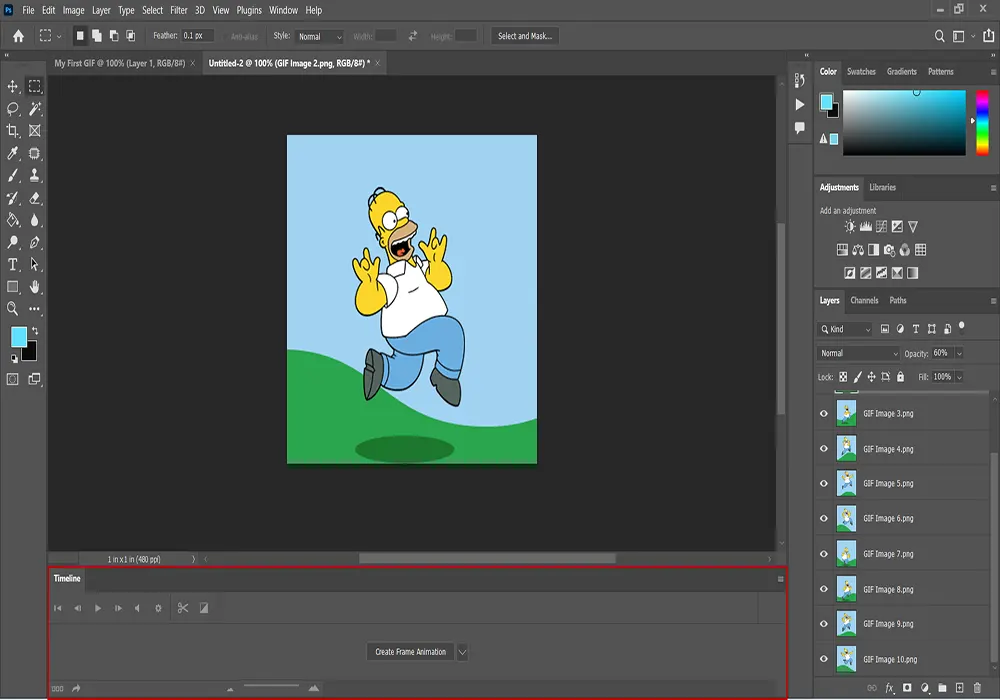
At the center of the timeline panel a dropdown menu with a down arrow. Click on the ‘down arrow. A list will appear with two options select the ‘Create Frame Animation’ option from the list and click on ‘Create Frame Animation’.

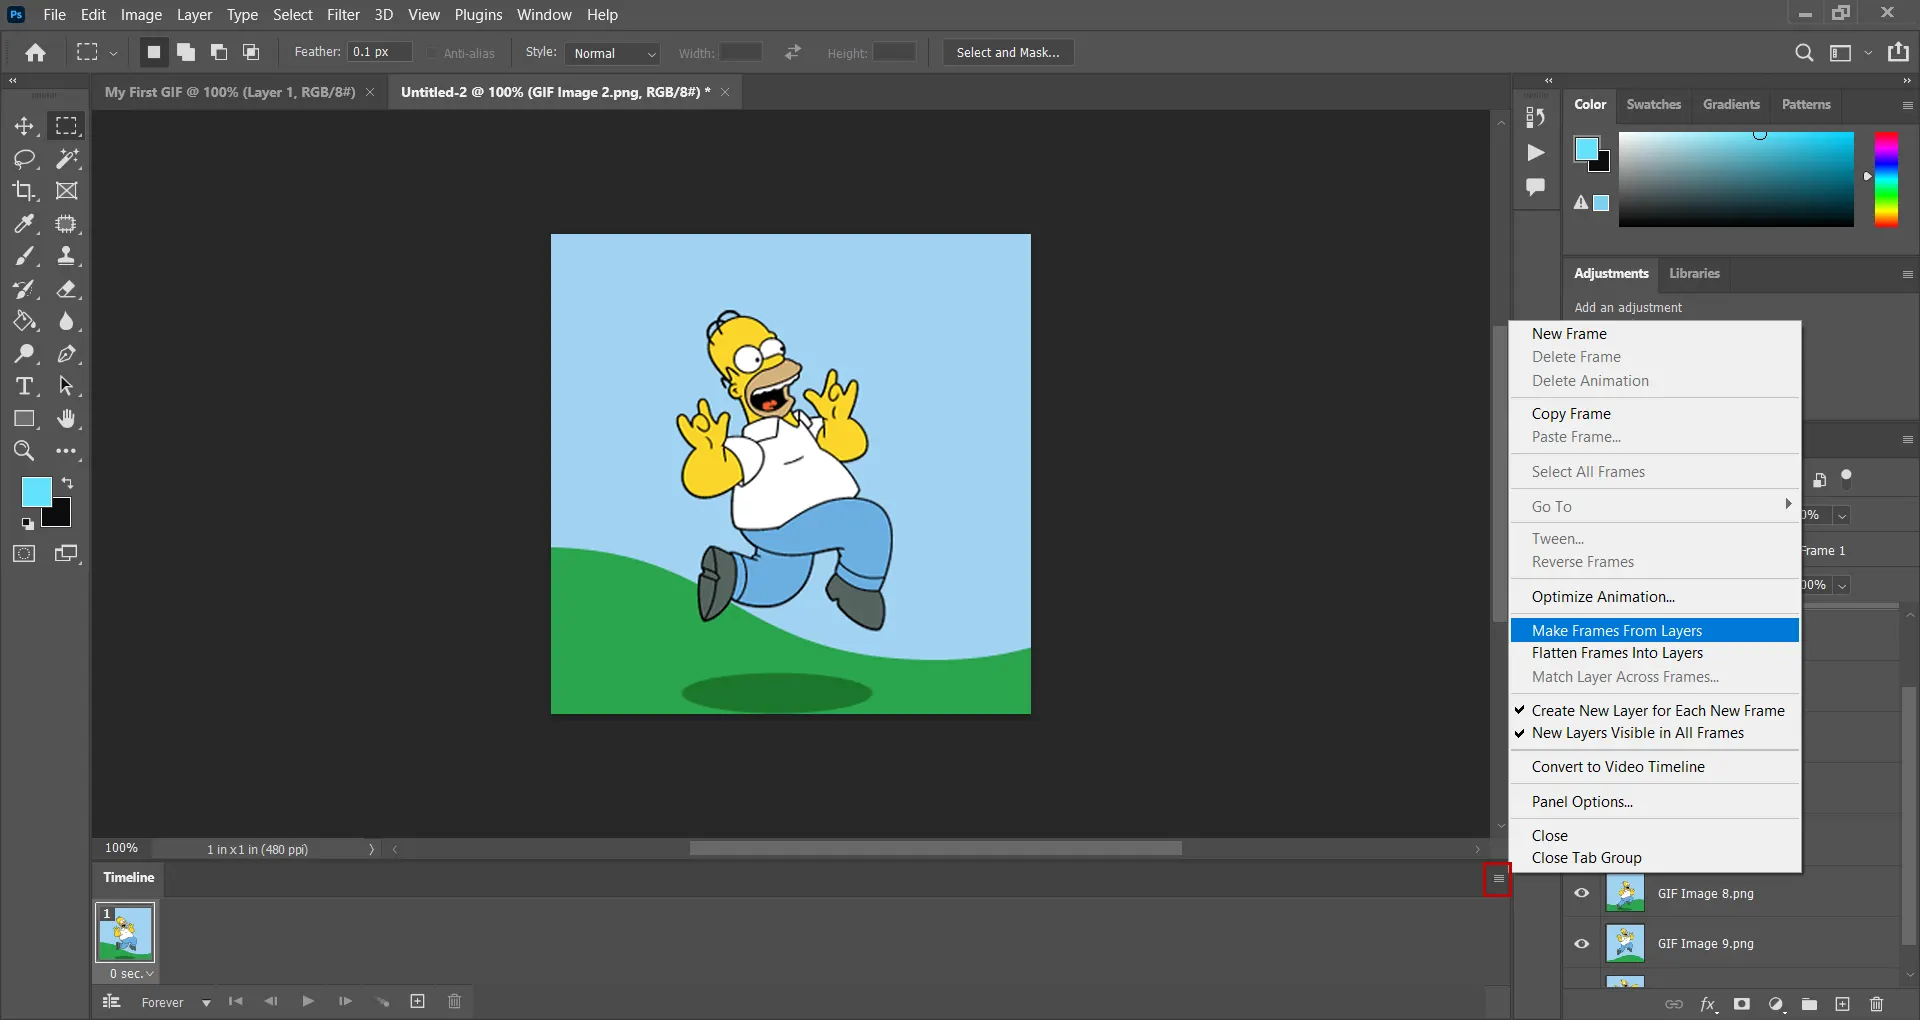
Your animation frame will appear on the timeline panel. Now click on the menu icon at the top right corner. A menu will appear on your screen now click on the ‘Make Frame From Layers’ option.
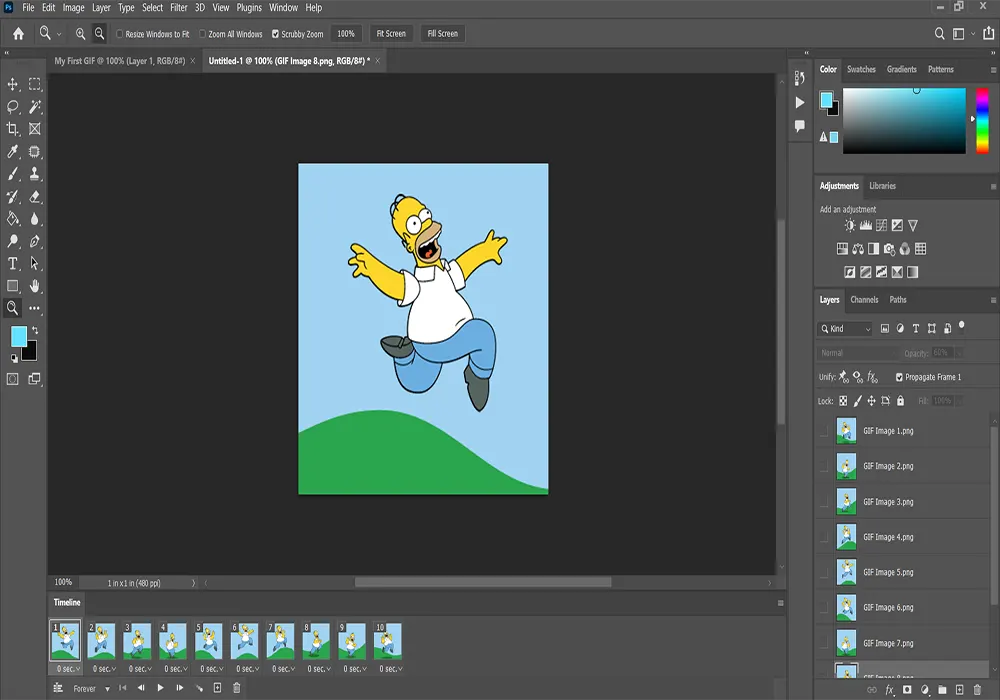
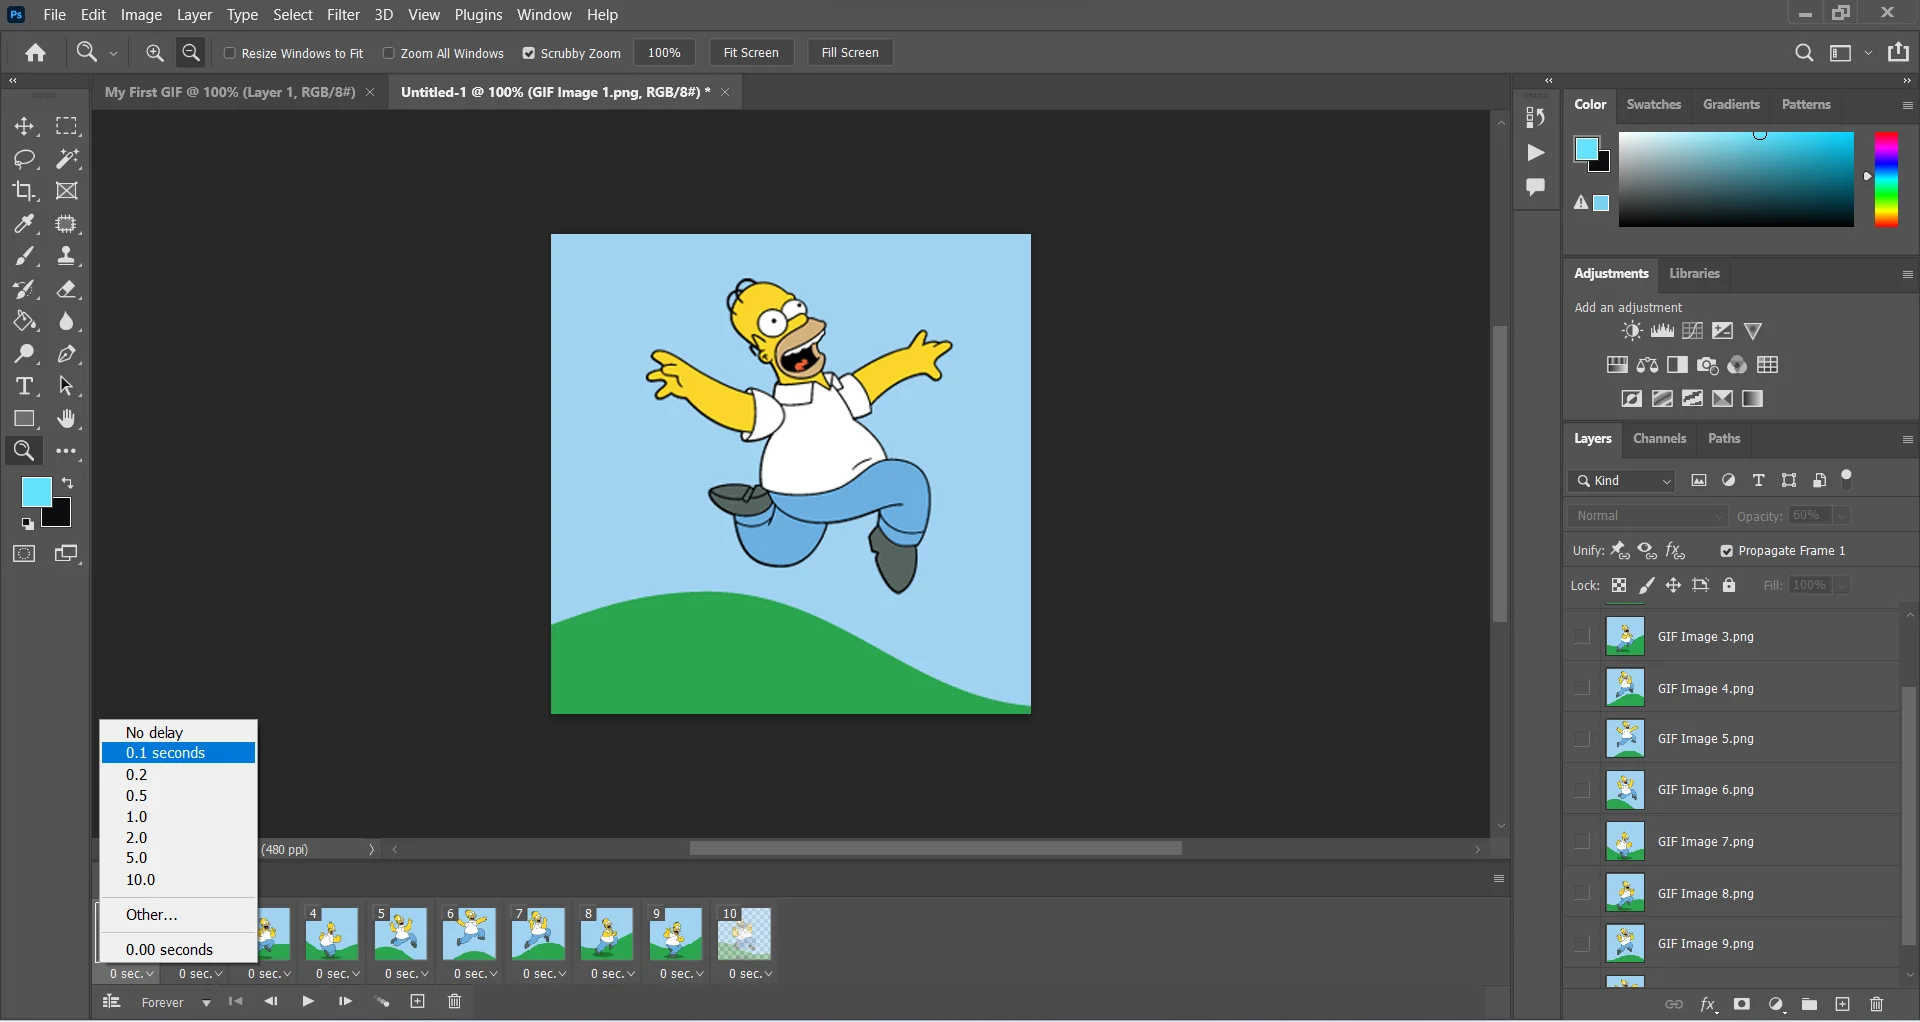
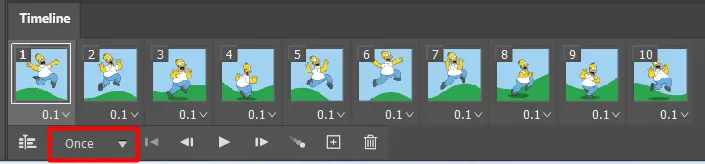
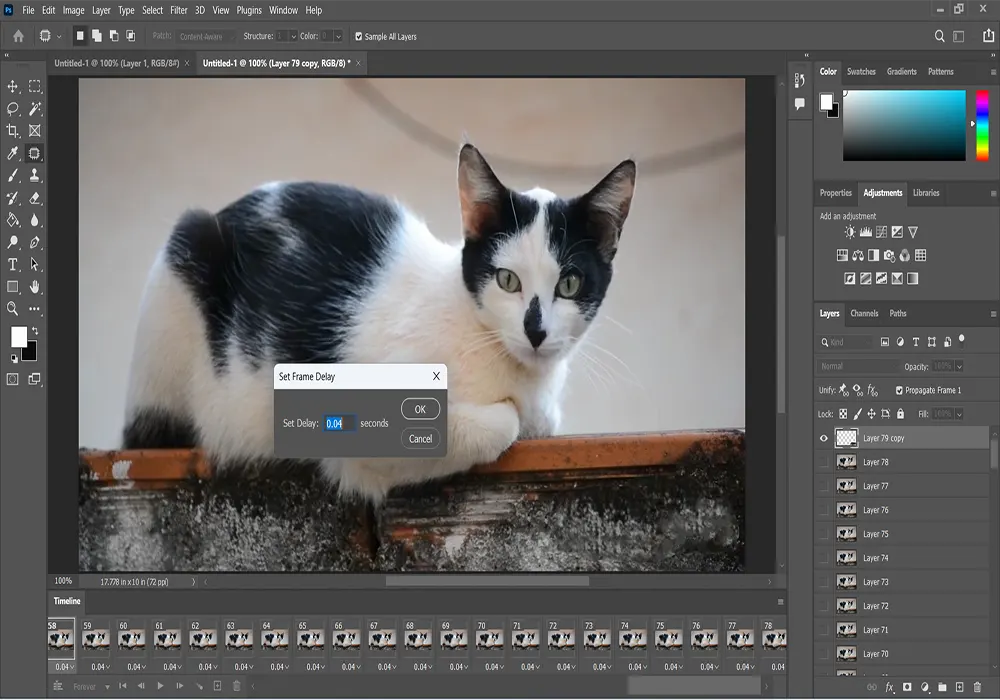
New frames will be created for every image and layer at the layer panel. At the bottom of every frame delay time is shown. To make a GIF change it to 0.01 seconds in every frame.
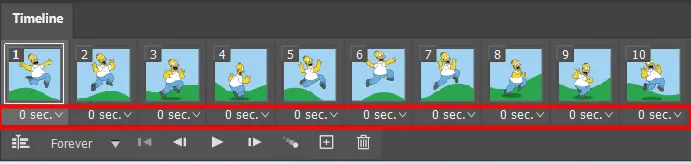
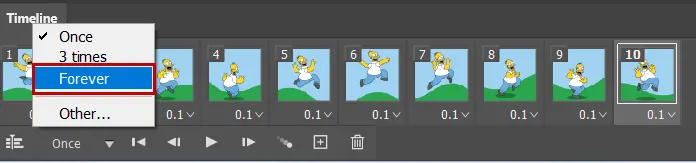
At the bottom of the timeline panel frame looping opting exists. If it is not in forever, click on the looping option a list will appear, and select forever from the list. Now play your GIF with the animation control option at the bottom for the timeline panel and the left of the looping option.
Step 5: Save your First GIF
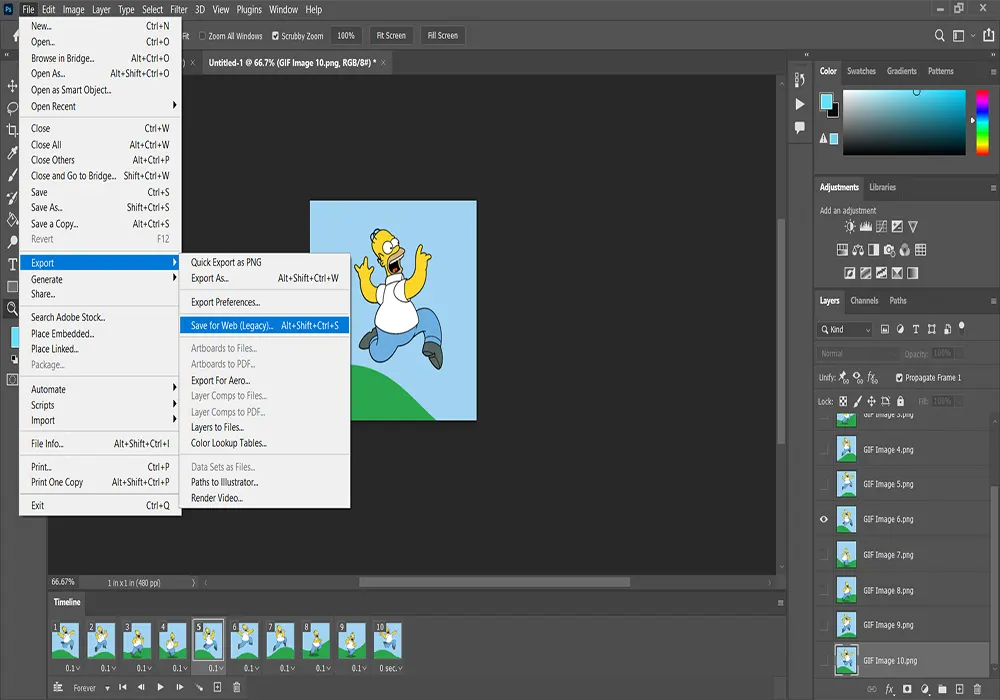
To save your file click on the 'File' option on the menu bar at the top of the screen and the first option of the menu bar. A drop-down menu will appear from the menu click on the 'Export' option a second menu will appear on the screen. From the sub-dropdown menu select the 'Save For Wab' option. A new window will appear on the screen.
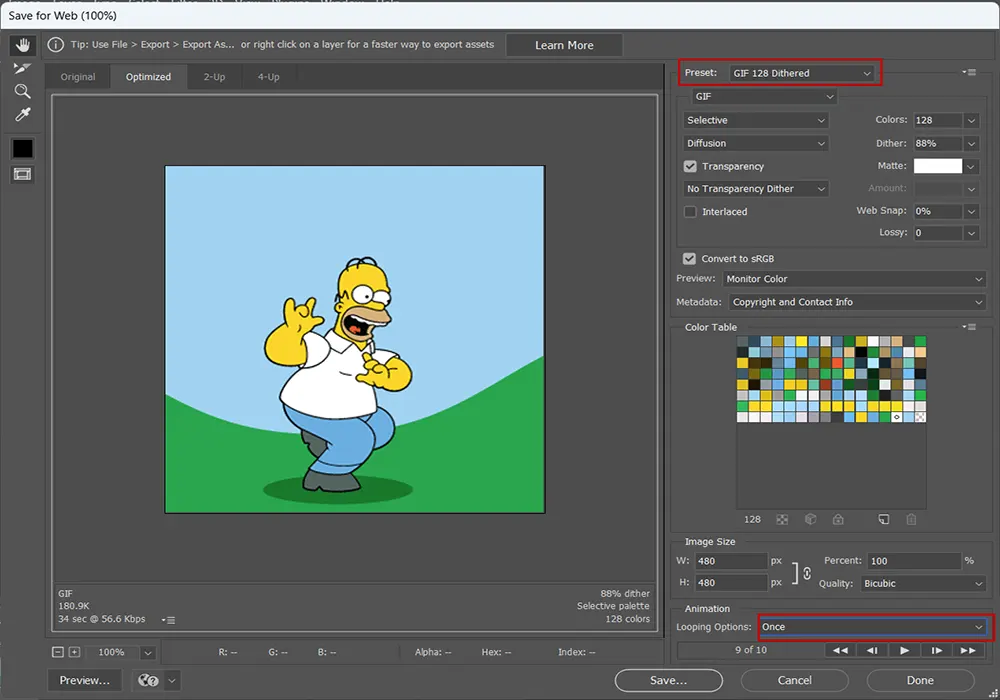
For the best color conversion select GIF 128 Dithered at the preset. And set the looping option to forever. Play the animation and see the preview. At the preview panel at the left of the new window. If you are satisfied with the result then click on the same button at the bottom of the panel.
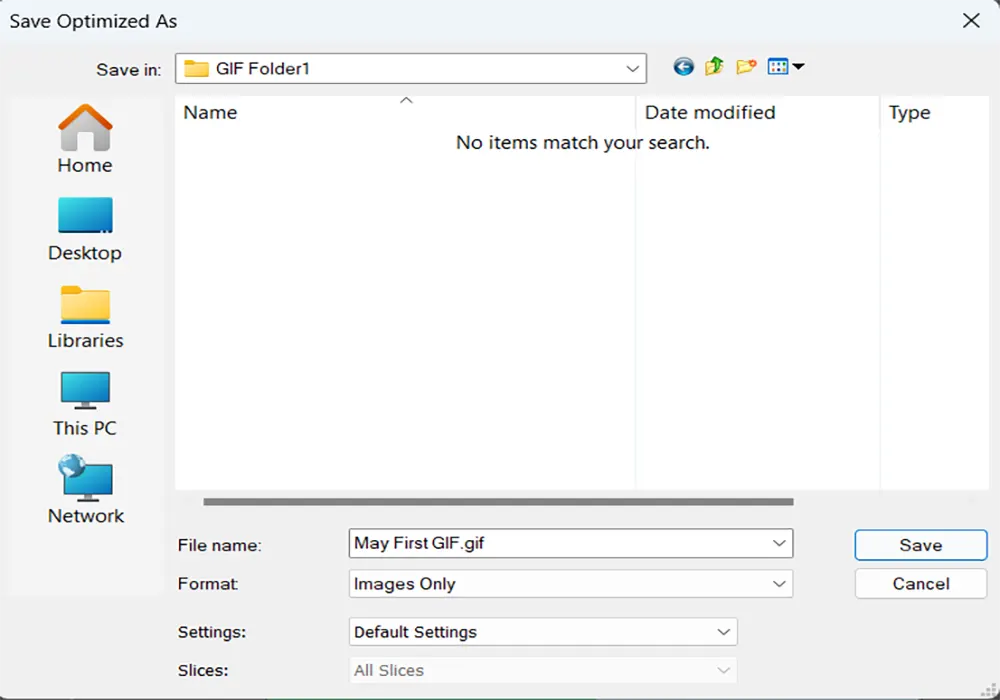
You will be redirected to the default folder to save your GIF file. Here you can rename your file once again or just save it.
Create GIF from Video
Creating a GIF image from video is simpler than creating GIF images from images. Let's learn how to make a GIF in Photoshop from video.
Step 1: Select your Video and Open Photoshop
Select a video to make a GIF it could be a whole video or a part of a video. you can make a folder for the video and cut and paste the video into the folder so you can find the video easily. Now open your Photoshop, simply double-click on the Photoshop icon, and wait till your software is ready to edit.

Step 2: Open a New Document file in Photoshop
After opening Photoshop, you will see two buttons 'Create New' and 'Open'. Click on the "Create New' button. A new window will open.
In this new window, you can name your GIF and set the side of the image. In this example, we name our GIF file “My First GIF”. The average size of a GIF file is 480px by 480px and the resolution will be 480px/Inch. After setting the Width, Height, and resolution click on the ‘Create’ button. Your new document file will be created as “My First GIF”.
Step 3: Open the video on Photoshop
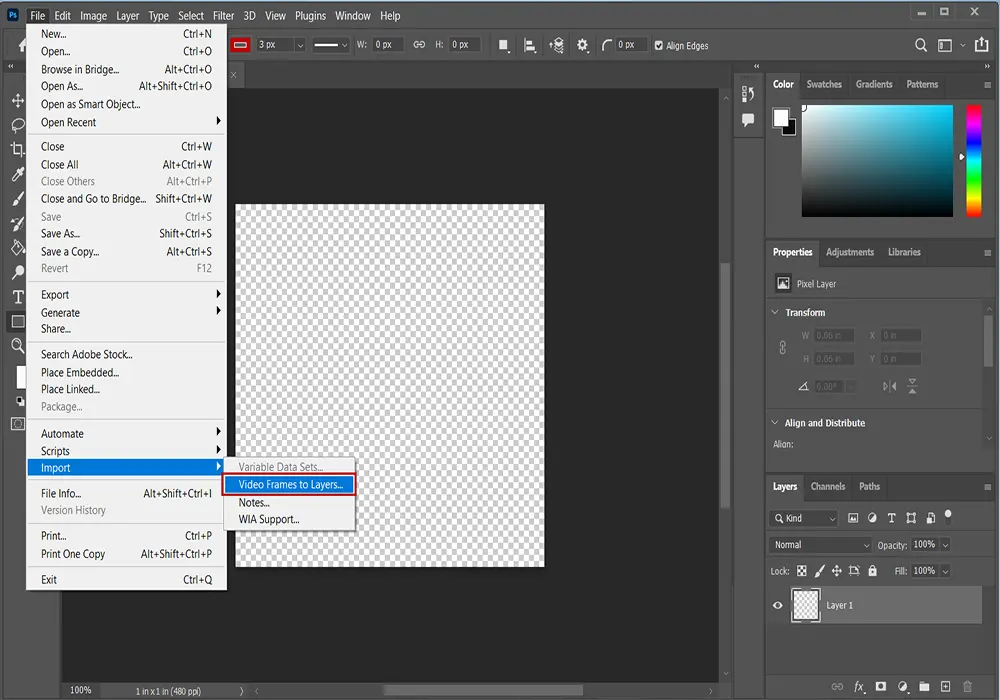

To open the desired video on Photoshop click on the 'File' option on the menu bar at the top of the screen. A drop-down menu will appear from the dropdown menu select the 'Import' option. A second menu will pop up, from the sub-menu select the 'Video Frames to Layers' option you will be redirected to the default folder. Now select your desired video for the folder you create.
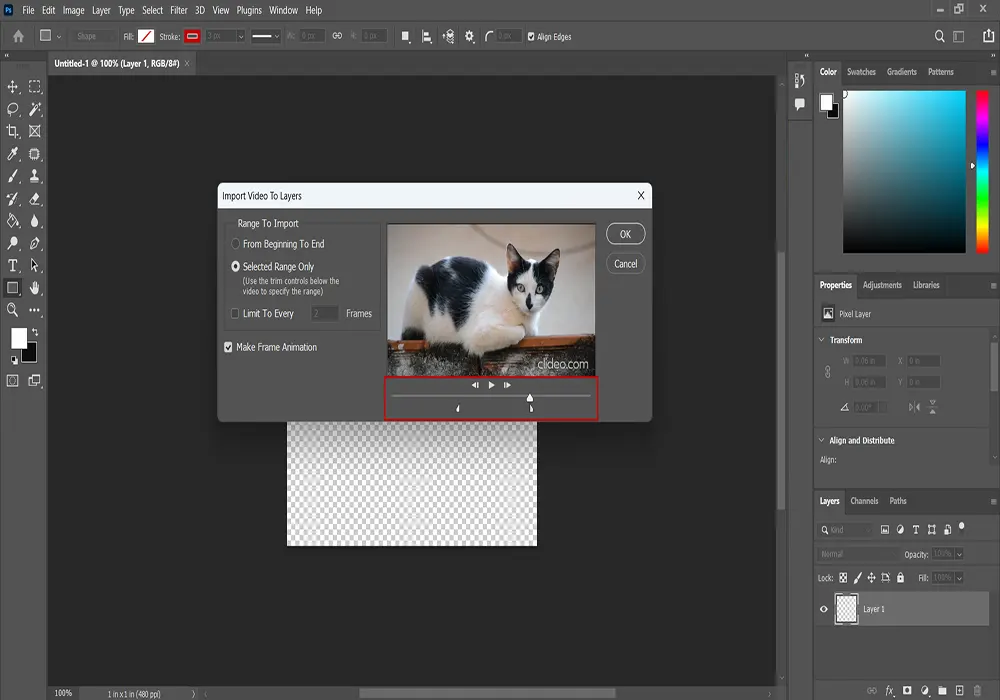
Your video with pop-up preview panel, here you can select the length of the video or the desired part of the video that you want to convert to a GIF file. After selecting the desired part of the video click on the 'OK' button at the top right corner. Your video will open layer by layer on the layer panel.
Step 4: Open the Timeline Panel and Make Frame
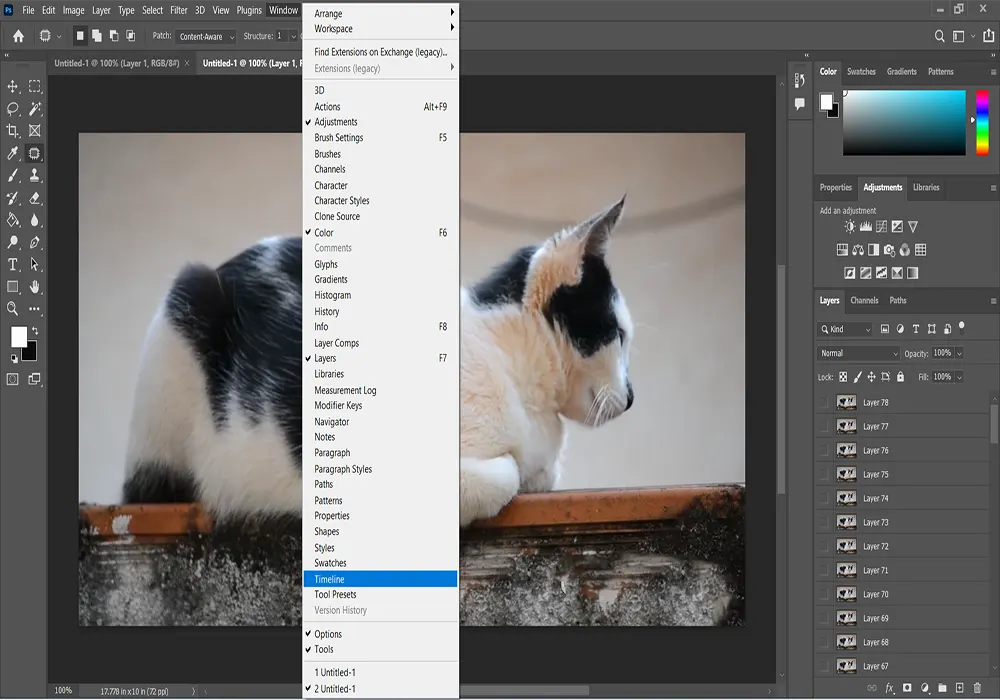
To set the frame rate and frame delay time open the 'Timeline' panel. Click on the 'Window' option at the menu bar at the top of the screen. A drop-down menu will appear, now select the 'Timeline' option from the drop-down menu. The 'Timeline' Panel will appear at the bottom of the screen with the dreams for every layer at the layer panel.

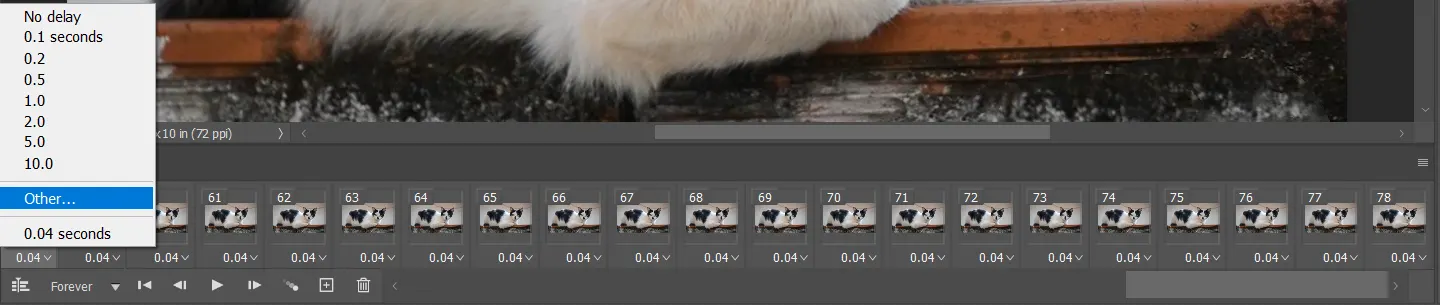
Now from the looping option set the looping option to forever. Now set the frame delay time the Frame delay time varies with the number of frames. In this example, we set the frame delay time to 0.04 seconds.
Step 5: Save the GIF
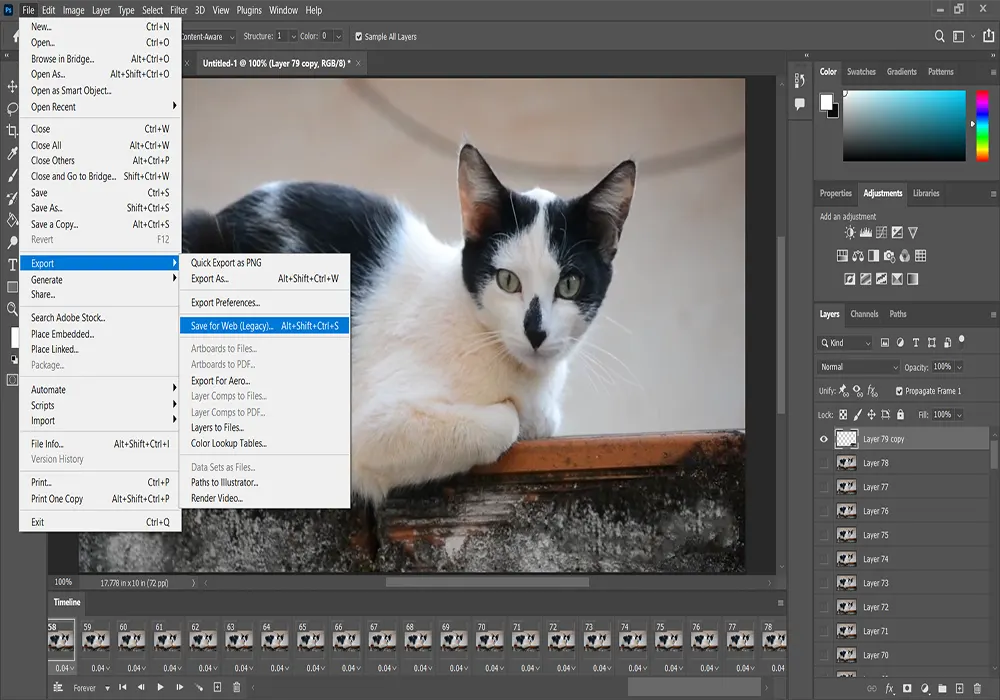
To save your file as a GIF image click on the 'File' option at the top of the screen. Now from the dropdown menu select the 'Save For Web' option. A new preview window will appear.

For the best color set the Preset option to GIF 128 Dithered and set the looping option to forever. Play the preview, if you are satisfied with the result then click on the 'Save' button at the bottom.
You will be redirected to the default folder to save your file. Here you can change the name of your file. If you don’t want to change your file name then click on the save button.
Final Thought
If you are making a GIF in Photoshop from the video it more easier. But you have to keep in mind is any watermark in the video or if any copyright issue will appear in the future. If you want to make a GIF in Photoshop from images then the flow of the content must be maintained.
Your images should be in a series and your main theme must appear in the images. If you are not using the Photoshop 2022 version then don't worry their not a significant preplacement of tools. You just need to find the right tools and functions for your GIF file.
Don't Miss Out -
Frequently Asked Questions
Can Photoshop Turn A Video into A GIF?
Yes, you can easily turn a video into a GIF file by using Photoshop. Here are 5 easy steps to turn a video into a GIF:
Step 1: Select your Video and Open Photoshop.
Step 2: Open a New Document file in Photoshop.
Step 3: Open the video in Photoshop.
Step 4: Open the Timeline Panel and Make Frame.
Step 5: Save the GIF.
Why is My GIF Not Working from Photoshop?
Your GIF might not be working in Photoshop because of the animation settings. To solve this problem, set your animation to repeat or loop from the timeline panel. You can open the timeline panel from the window>timeline.
Why Does My GIF have Dots?
Primarily, your GIFs have dots for two reasons, it might be your pixels are fully transparent, or it is fully opaque. You can fix the issue of this type of dots by adjusting Transparency Dithering before exporting the GIF.