Rule of Thirds in Photography | A Complete Guide
Do you know what the Rule of Thirds in Photography is? Here's how to apply the Rule of Thirds to your photography. Most people who enjoy taking pictures are familiar with some of the photography guidelines.
The Rule of Thirds is considered to be among the most significant and beneficial. It's crucial to understand what it is and how to apply it to your photography, even though it's more of a suggestion than a strict rule.
Definition of Rule of Thirds in Photography
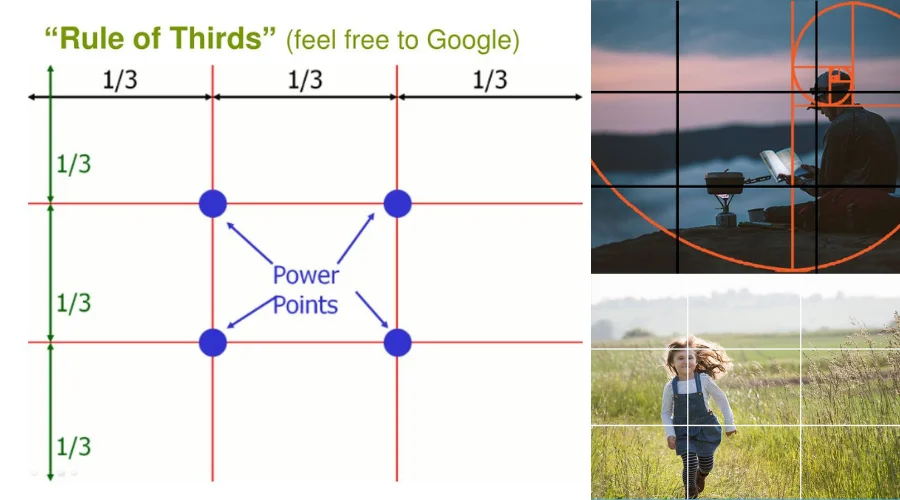
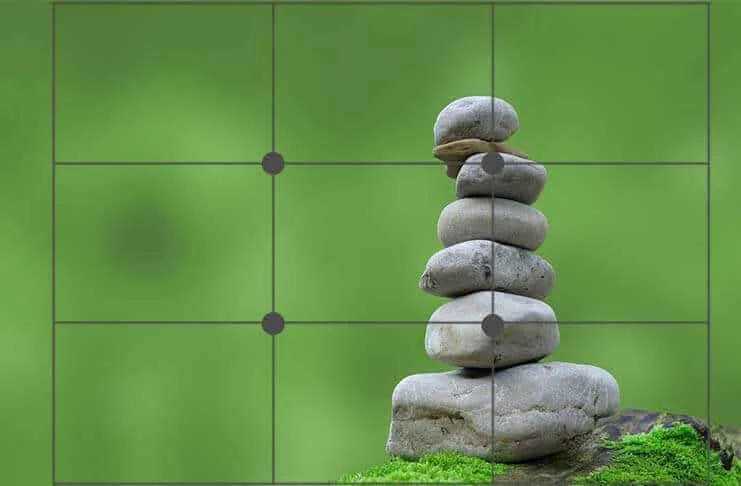
According to the Rule of Thirds, a scene can be split into thirds by two horizontal and two vertical lines. Nine equal-sized boxes with four junction points can be created by drawing these lines as a grid inside of a frame.
The shot will have a more visually pleasing composition if a subject is placed at the intersection points, along with either the horizontal or vertical lines or inside any of the nine boxes.
Purpose of Rule of Thirds in Photography
The purpose of the Rule of Thirds is to help photographers create images that are more engaging and dynamic by using a grid that divides the image into thirds both horizontally and vertically.
By dividing an image into a 3x3 grid, the Rule of Thirds provides a framework for placing the subject or other important elements of the image at one of the four intersection points, known as "power points" or along one of the grid lines.
The Rule of Thirds also helps photographers create a sense of movement or direction in the image by using the grid lines to guide the viewer's eye through the image. By placing elements along the grid lines, photographers can create a sense of movement that leads the viewer's eye from one part of the image to another.
Ever wondered how stunning photos achieve that perfect balance and draw your eye in? The secret sauce might lie in a simple yet powerful technique called the rule of thirds.
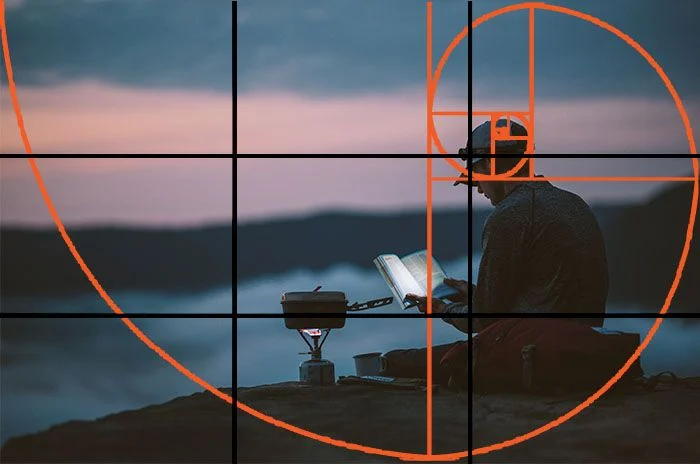
Picture a tic-tac-toe board on your viewfinder. It splits the frame into nine equal squares. The magic happens at the spots where the lines meet. We call those four spots intersection points. The rule of thirds suggests placing your main subject on one of these points or along the grid lines.
Why does this work? It creates a natural sense of balance and visual interest. Place the weight of your composition evenly. This prevents your subject from getting lost in the middle or feeling off-center.
Let's see some examples in action:
To create a balanced picture, put the horizon in the top or bottom third of the landscape. Picture a calm sunrise covering the upper part of your view. Or see a large meadow spreading across the lower part.
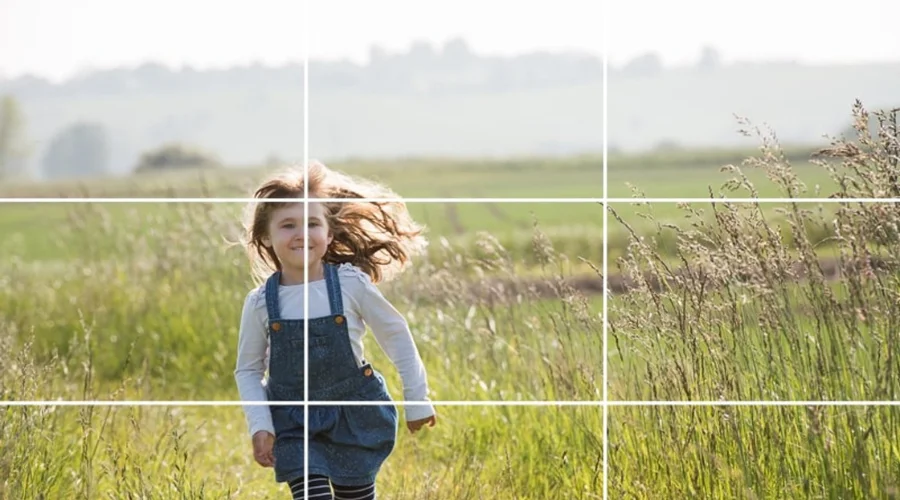
Portraits: Position your subject's eyes on the upper third for a natural and engaging look. This makes the viewer focus on their expression and feel connected.
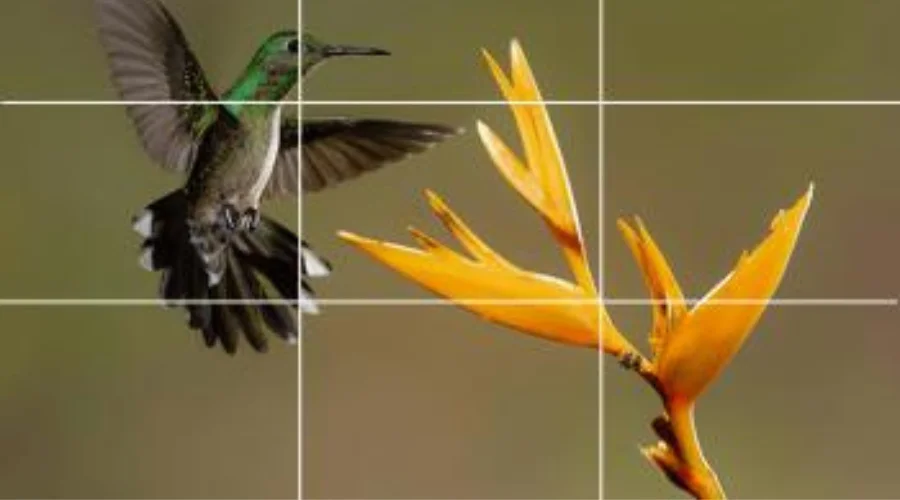
Action shots: Utilize the intersecting points to inject dynamism and tension. A cyclist is crossing a grid intersection in mid-air. The focus is on the energy and movement of the scene.
Remember, the rule of thirds is a guideline, not a rulebook! Don't be afraid to experiment and break it when it serves your creative vision. Here are some tips to take your compositions to the next level:
Turn on the grid on your camera. Some cameras have a grid overlay that shows you the rule of thirds while you're taking pictures.
Embrace negative space: Don't overcrowd your frame. Give your subject breathing room and let the empty space add impact.
Use leading lines. Natural lines, such as roads, fences, or rivers, can guide the viewer's eye towards your subject. This creates a sense of depth and flow.
For beginners:
Start by understanding the concept. Learn the grid. Place your subject at the intersection points to improve balance.
Practice framing: Train your eye to see potential compositions in your surroundings.
Don't be afraid to break the rule! Experimentation is key to finding your unique style.
You can use editing tools to help you. For example, software like Photoshop lets you change compositions later on. This gives you flexibility to apply or change the rule of thirds.
Ready to dive deeper? Take a look at these great resources. They will give you all the information, tutorials, and guides you need to master the rule of thirds.
- Adobe: https://www.youtube.com/watch?v=FBHw5dVf5VA
- PetaPixel: https://petapixel.com/2021/01/25/an-intro-to-the-rule-of-thirds-in-photography/
- Digital Photography School: https://www.videoschool.com/rule-of-thirds-photography/
- Capture the Atlas: https://www.capturelandscapes.com/the-rule-of-thirds-explained/
Remember, the rule of thirds is just one tool in your photographer's toolbox. To make interesting stories, understand the principles and try different writing styles. This will help you tell your own story in a captivating way.
So, go forth, frame creatively, and break the rules when it sparks your artistic spirit!
Rule of Thirds Examples
Some Examples of the 'Rule of Thirds' are given below:
Landscape Photography

In a landscape photograph, the horizon line is often placed on the upper or lower third line, with the land or sky taking up the other two-thirds of the frame.
Portrait Photography

In a portrait photograph, the subject's eyes are often placed on the upper third line, creating a sense of balance and directing the viewer's attention to the subject's face.
Action Photography

In action photography, the subject is often placed on one of the intersecting points to create a sense of movement and dynamic tension.
Remember, the rule of thirds is a guideline, not a hard and fast rule. While it can help create visually appealing compositions, sometimes breaking the rule can result in more creative or impactful photographs. Experiment with different compositions and find what works best for your subject and style.
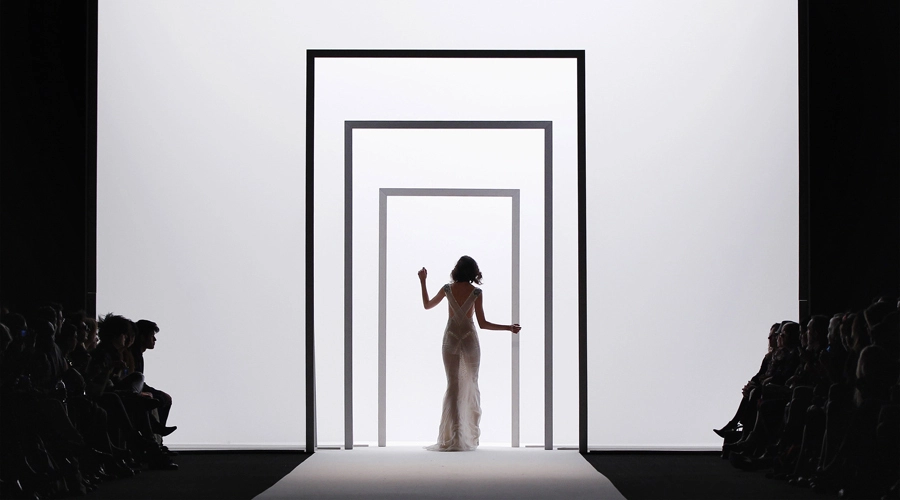
Framing Photography
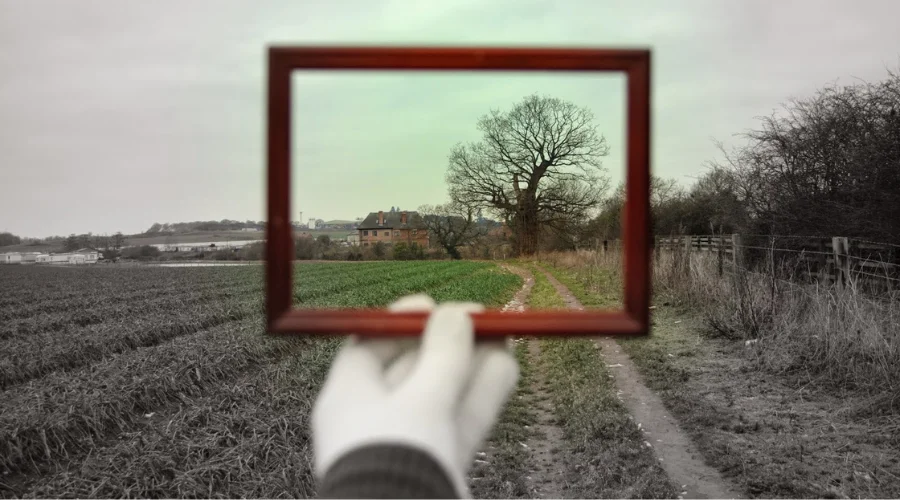
Framing in photography is the technique of using elements within a scene to create a visual frame around the main subject. This technique can add depth, context, and interest to an image, and it can help direct the viewer's attention to the subject.
There are many ways to use framing in photography. For example, you can use natural elements like trees, arches, and doorways to create a frame around the subject. You can also use man-made objects like windows, mirrors, and fences to frame the subject.
Overall, framing is a powerful technique that can help you create more interesting and dynamic photographs. Experiment with different framing techniques and see how they can enhance your images.
Leading Lines Photography

Leading lines in photography are lines or shapes within an image that draw the viewer's eye toward the main subject or point of interest. They are typically straight or curved lines that guide the viewer's gaze from one part of the image to another, creating a sense of depth and movement.
How to Use Rule of Thirds in Photography

The rule of thirds is a basic principle in photography composition that involves dividing the image into thirds both vertically and horizontally, creating a grid of nine equal parts.
The idea is to position the main subject or point of interest at the intersections of these lines, or along the lines themselves, rather than in the center of the image. Here are some steps to use the rule of thirds in photography
Activate the Grid Lines on Your Camera
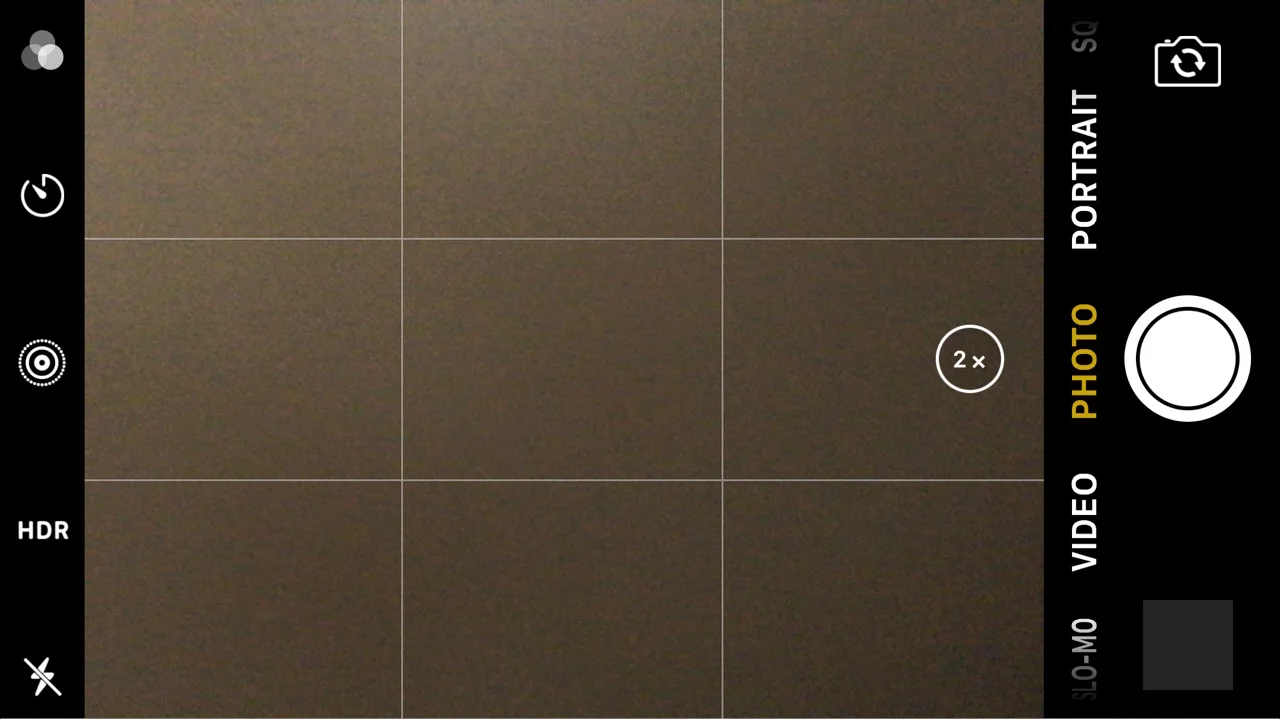
Most cameras and smartphones have the option to display a grid of thirds on the screen or viewfinder. This can help you visualize the composition as you shoot.
Identify the Main Subject

Decide what you want to be the focal point of the image, and position it either on one of the four intersecting points or along one of the lines.
Use Negative Space
Leave some empty space around the subject to create a more balanced and visually pleasing composition. This can also help to convey a sense of scale or environment.
Experiment with Placement
Try different positions for the subject within the grid to see how it affects the overall composition. You might find that one placement works better than another, depending on the scene and your intention.
Remember that the rule of thirds is a guideline, not a hard and fast rule. You can choose to break it if it serves your purpose, but understanding the principles behind it can help you create more dynamic and engaging compositions in your photography.
Main Components of Rule of Thirds in Photography
The Rule of Thirds is a fundamental principle in photography that can help photographers create balanced, visually pleasing compositions. The Rule of Thirds divides an image into a 3x3 grid, with two horizontal lines and two vertical lines intersecting at four points, known as "power points."

The main components of the Rule of Thirds are:
- Grid: The grid is the fundamental component of the Rule of Thirds. It is a 3x3 grid that divides the image into nine equal parts. The lines are usually not visible in the final image, but they can be used as a guide when framing the shot.
- Power Points: The four points where the horizontal and vertical lines intersect are known as "power points." These points are located at the top-left, top-right, bottom-left, and bottom-right of the grid. The power points are the most important elements of the Rule of Thirds, as they are often used to place the subject of the image or other important elements.
- Lines: The horizontal and vertical lines that divide the image into thirds are another essential component of the Rule of Thirds. These lines help to create a sense of balance and symmetry in the image. The lines can also be used to create a sense of movement or direction in the image.
Rule of Thirds for Beginners
If you're new to photography, the Rule of Thirds is a fundamental principle that you should be familiar with. Here are some tips to help you get started with the Rule of Thirds:
Understand the Concept

The Rule of Thirds is a compositional guideline that suggests dividing an image into a 3x3 grid, with two horizontal and two vertical lines intersecting at four points.
The goal is to place the subject or other important elements of the image at one of the power points or along one of the grid lines to create a balanced and visually pleasing composition.
Use your Camera's Grid

Many cameras have a grid overlay that you can turn on in the settings. This will display the grid lines and power points on your camera's LCD screen or viewfinder, making it easier to frame your shots using the Rule of Thirds.
Practice Framing Your Shots

When you're out taking photos, try to frame your shots using the Rule of Thirds. Look for opportunities to place the subject or other important elements at one of the power points or along one of the grid lines.
Experiment with different compositions to see how they affect the overall look and feel of the image.
Don't be Afraid to Break the Rules

While the Rule of Thirds is a helpful guideline, it's not a hard and fast rule. Sometimes breaking the rule can result in a more interesting or dynamic composition. As you become more experienced, you'll learn when it's appropriate to use the Rule of Thirds and when it's better to break it.
Edit your Photos

If you've taken a photo that doesn't quite follow the Rule of Thirds, don't worry. You can always crop the image later to adjust the composition. Most photo editing software includes a crop tool that allows you to adjust the composition of the image after it's been taken.
By following these tips, you can start incorporating the Rule of Thirds into your photography and creating more visually engaging and balanced compositions.
Conclusion
In conclusion, The rule of thirds helps guide the viewer's eye and adds depth and interest to the image. While it's important to remember that the rule of thirds is just a guideline and not a strict rule, it can be a useful starting point for creating compositions that draw the viewer's eye and create a sense of balance and harmony.
Overall, learning and applying the rule of thirds in photography is a valuable tool for photographers looking to create visually effective and engaging images.
Checkout Our Latest Articles
- History of Photography | Camera, Photo & Video
- Excellent Tips for Aesthetic Photography
- 10 Best Techniques to Help You Start Learning Photoshop
FAQ
What is the rule of 9 in photography?
There is a rule that suggests the frame be divided into 9 equal parts, each of which can be established by two imaginary, equidistant lines along both horizontal and vertical axes.
What is the rule of thirds theory?
According to the rule of thirds, your subject should be positioned in the left or right third of the image, leaving the other two-thirds more open. Although there are other forms of composition, the rule of thirds generally results in photographs that are compelling and well-composed.